Mac T2 Lockout FAQ
Download my résumé as a Word compressed zip file and Adobe Acrobat. Need computer help? Book now to resolve most computer issues. Tech support jobs.
The T2 chip incorporated on 2017 and later Macs has created a bit of a conundrum for people needing to wipe and
clean the Macs to move from one user to another. If you don't have the original user's admin credentials, and
you fail to unlock the T2 chip before wiping the computer you will find reinstalling an operating system from internet recovery
after using the Disk Utility on internet recovery results in a screen like this:
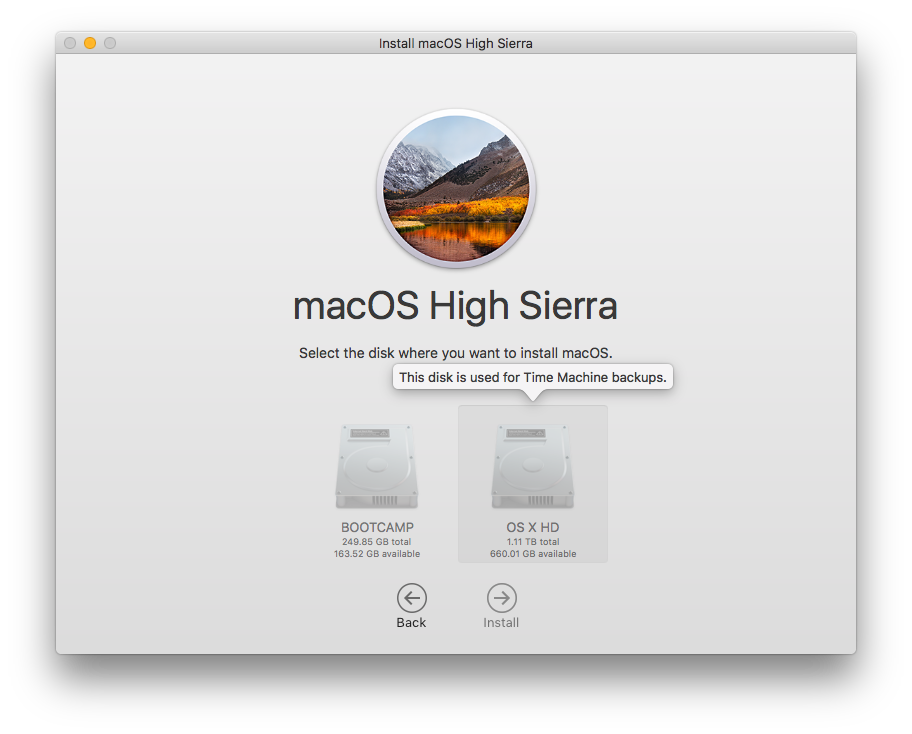
Where all volumes attached are grayed out. Furthermore, you won't find any login to unlock the security utility available on the recovery screen. It is then that this document becomes useful.
1. You will need another USB-C Mac, that has a bootable operating system later than 10.13, with a version of the operating system that will
work with the locked out Mac in question.
2017 Macs run 10.13.6 or later.
2018 Macs run 10.14.6 or later.
2019 Macs run 10.15.7 or later.
2020 Macs run 11.0 or later.
Use Apple's warranty status page to determine the age of your computer.
2. You will need a thunderbolt USB-C cable to connect the two Macs.
3. You will need to boot the locked out Mac with target disk mode. This means using the built-in or wired USB keyboard to boot with the 'T' key.

4. On Macs that are not laptops, just the USB logo of the arrow in the middle path, the square on the top right, and circle on top left and bottom of the logo will appear. Make sure the Mac is powered if it is a laptop.
5. Hook up the lightning USB-C cable to the working Mac. Open Disk Utility
6. And use the View menu to show all volumes.
7. When you see the Mac attached in target mode, select its volume and Erase it Mac OS Extended Journaled first. Then select it again, and erase as APFS.
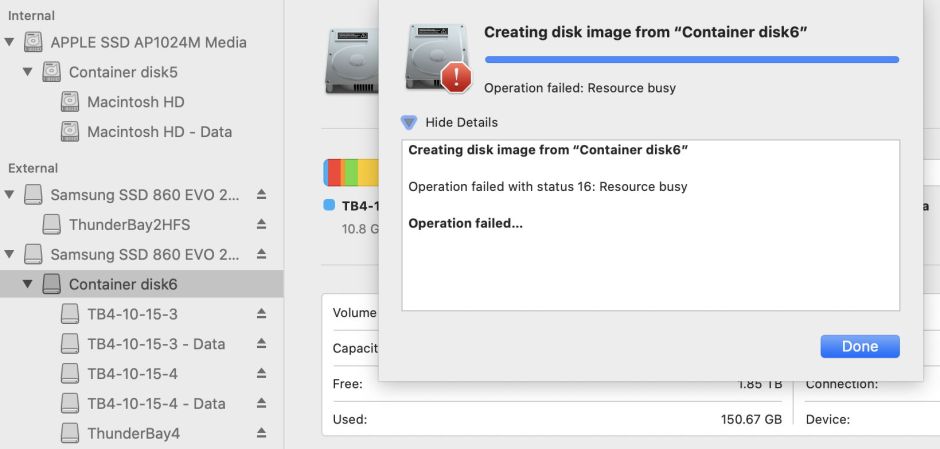
In the end the left side bar of Disk Utility will show a sub heading container for the external target disk mode disk of the Mac, must like shown on this image:
8. Once it is properly formatted, you will be able to clone your working Mac to the locked out. I have found Carbon Copy Cloner
works best.
9. When the clone is complete, shut down the good Mac. Then detach the USB cable, and reboot the secure Mac in recovery again with simply a command-R. It will ask if you want to change the startup disk or Update. Update.
Once the update is complete, the startup progressbar will appear on the screen several times. Eventually the clone will be booted on the new machine.
|